Hydration and Performance

Best Morning Workouts to Boost Energy

Best Morning Workouts to Boost Energy

Best Morning Workouts to Boost Energy

Best Morning Workouts to Boost Energy are one of the simplest yet most powerful ways to start your day feeling refreshed, alert, and motivated. For people balancing busy schedules, making time for morning exercise not only improves physical fitness but also enhances productivity, mood, and focus. Whether you train at home with Solefitness equipment, hit the gym at  SoleFitness machines, beginning your day with the right workouts will help you unlock long-lasting energy.


Why Best Morning Workouts to Boost Energy Are Important

Starting your day with exercise boosts blood circulation, improves oxygen delivery to the brain, and stimulates the release of endorphins, which help reduce stress and increase happiness. Unlike late-day workouts, morning sessions help regulate your body clock, giving you more consistency in your fitness journey.

Morning workouts also speed up metabolism, making your body burn calories throughout the day. With SoleFitness machines, you can easily incorporate these routines into your mornings without hassle.


 Best Morning Workouts to Boost Energy at Home

You don’t always need a gym to start your day strong. With the right setup at home, you can easily perform these quick and effective workouts:

  • Jumping Jacks – Warm up your body and boost circulation.
  • Push-Ups – Strengthen your upper body and activate core muscles.
  • Resistance Band Squats – Perfect with Solefitness resistance bands for a quick full-body burn.
  • Planks – Build core stability and improve posture for your daily activities.

For beginners, Best Home Gym Setup for Beginners (from our earlier guide) can be a good resource to create an affordable yet powerful morning fitness space.


H2: Best Morning Workouts to Boost Energy at the Gym

If you prefer training at  SoleFitness machines, here are excellent morning workout choices:

  • Treadmill Intervals – A 10–15 minute jog or sprint session will wake up your metabolism.
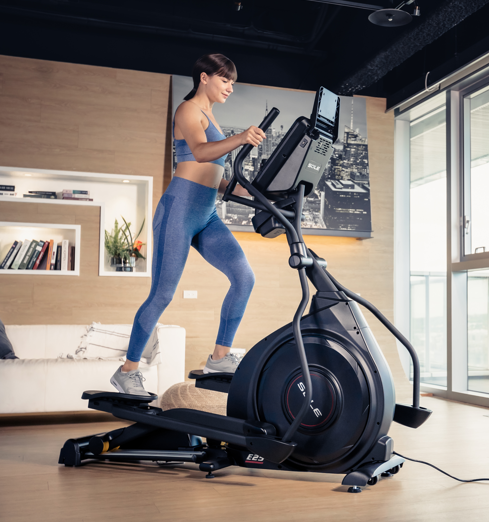
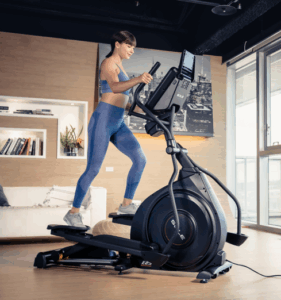
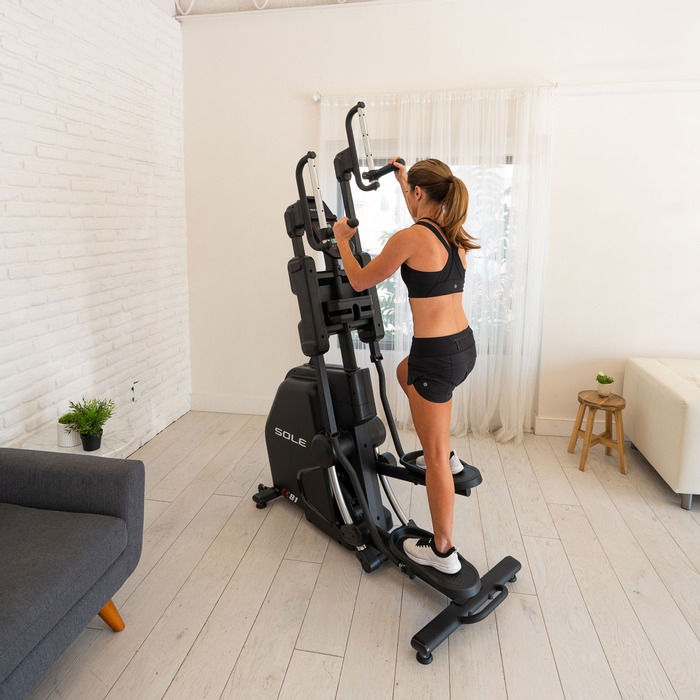
  • Elliptical Training – Gentle on the joints while providing a full-body calorie burn.
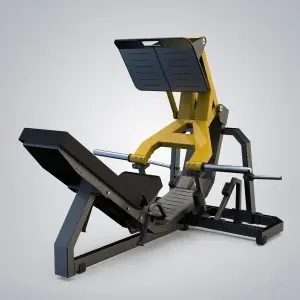
  • Leg Press Machine – A powerful way to build lower-body strength early in the day.
  • Incline Row Machine – Improves back strength while supporting posture.

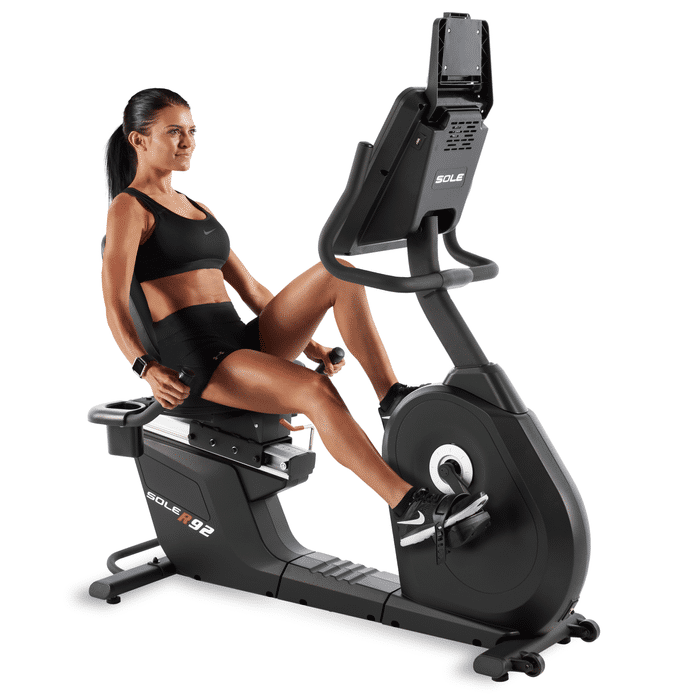
Check out our Sole Treadmill Review and Sole Recumbent Bike Deep Dive for more equipment insights.


 Nutrition Tips to Support Best Morning Workouts to Boost Energy

Fueling your morning routine is just as important as the workout itself. A light meal like oatmeal, bananas, or a protein shake can help maximize your performance. You can also explore Supplements for Fat Loss or energy supplements if your goal is weight management and sustained vitality.


FAQs on Best Morning Workouts to Boost Energy

Q1: How long should morning workouts last?
A: Aim for at least 20–30 minutes to get your heart rate up and activate your metabolism.

Q2: Is it better to work out before or after breakfast?
A: Light fasted workouts may burn fat faster, but a small snack or shake can give you more stamina.

Q3: Can I do strength training in the morning?
A: Yes, morning is a great time for strength workouts since it helps improve focus and consistency.


     Incline Row Machine: Benefits & How to Use


   Introduction

The incline row machine: benefits & how to use should be one of the top things beginners and advanced lifters understand when stepping into strength training. This machine is designed to target the back muscles, improve posture, and build overall upper-body strength. At GateGold, BuyFitness, and SoleFitness, we believe that proper guidance on using equipment like the incline row machine can help you maximize results while reducing the risk of injury.


     Incline Row Machine: Benefits & How to Use

      What is an Incline Row Machine?

The incline row machine is a strength training tool designed to mimic the rowing movement while providing support for your chest and body. Unlike free-weight rows, this machine stabilizes your torso, allowing you to focus on activating your lats, rhomboids, and rear delts.


 Benefits of Incline Row Machine

Using the incline row machine comes with several key benefits:

  1. Builds a Strong Back – Targets lats, traps, and rhomboids for thickness and width.
  2. Improves Posture – Strengthens the upper back to counter slouching from daily sitting.
  3. Reduces Lower Back Stress – Unlike bent-over rows, the chest support reduces strain.
  4. Enhances Muscle Isolation – Focus on muscle engagement without momentum.
  5. Great for All Levels – Safe and effective for both beginners and experienced lifters.

H2: How to Use Incline Row Machine Correctly

To maximize results from the incline row machine, follow these steps:

  1. Adjust the Seat & Chest Pad – Make sure your chest rests comfortably on the pad.
  2. Grip the Handles – Use either a neutral or overhand grip depending on target muscles.
  3. Engage Core & Pull – Pull the handles towards your body, squeezing shoulder blades together.
  4. Controlled Release – Slowly extend arms back to starting position without dropping weight.
  5. Repetitions – Aim for 3–4 sets of 8–12 reps for muscle growth.

H2: Common Mistakes to Avoid

  • Using Too Much Weight – Focus on controlled form, not heavy loads.
  • Shrugging Shoulders – Keep shoulders down to activate lats properly.
  • Fast Movements – Maintain slow and steady reps for muscle engagement.

H2: Who Should Use the Incline Row Machine?

The incline row machine is perfect for:

  • Beginners learning rowing form.
  • Athletes seeking back strength and power.
  • Anyone with lower-back discomfort from free-weight rows.

For more scientific insights on rowing benefits, check out Healthline’s guide on rowing exercises.


FAQs About Incline Row Machine: Benefits & How to Use

Q1: Is the incline row machine good for beginners?
Yes, it’s excellent because it provides chest support, making it safer than free-weight rows.

Q2: How often should I use the incline row machine?
2–3 times per week is enough to build back strength when combined with other exercises.

Q3: Can it replace traditional barbell rows?
It doesn’t replace them entirely but is a great complementary exercise to reduce lower-back strain.

Q4: Which muscles does the incline row machine target the most?
Lats, traps, rhomboids, and rear delts are the primary muscles activated.


Final Takeaway: The incline row machine: benefits & how to use guide shows that this equipment is one of the safest and most effective tools for building a stronger, healthier back. At GateGold, BuyFitness, and SoleFitness, we recommend adding it to your weekly workout routine for maximum results.


Would you like me to also design a promotional infographic image (like we did for Home Gym Safety & CrossFit vs Strength Training) with GateGold, BuyFitness, and SoleFitness branding included?

10-Min HIIT for Busy Moms

10-Min HIIT for Busy Moms

10-Min HIIT for Busy Moms

10-Min HIIT for Busy Moms

Why 10-Min HIIT for Busy Moms Matters

The 10-Min HIIT for busy moms is more than just a workout routine—it’s a time-saving fitness solution that allows mothers to prioritize their health without sacrificing family responsibilities. High-Intensity Interval Training (HIIT) is designed to deliver maximum results in minimal time, making it the perfect option for moms with packed schedules. At SoleFitness,  we understand that fitness should fit seamlessly into your lifestyle, which is why this workout is both efficient and effective.


H2: The Power of 10-Min HIIT for Busy Moms

The 10-Min HIIT for busy moms is built around short bursts of intense activity followed by brief recovery periods. Even in just ten minutes, this workout can:

  • Burn calories faster than traditional cardio.
  • Improve cardiovascular health.
  • Build strength and endurance.
  • Boost metabolism and energy levels throughout the day.

This makes HIIT not only effective but also sustainable for moms balancing work, kids, and household tasks.


H2: A Sample 10-Min HIIT Workout for Busy Moms

Here’s a quick routine you can try at home with no equipment:

  1. Jumping Jacks – 45 seconds work, 15 seconds rest.
  2. Squats – 45 seconds work, 15 seconds rest.
  3. Push-ups (modified if needed) – 45 seconds work, 15 seconds rest.
  4. Mountain Climbers – 45 seconds work, 15 seconds rest.
  5. Burpees – 45 seconds work, 15 seconds rest.
  6. High Knees – 45 seconds work, 15 seconds rest.
  7. Plank Hold – 1 minute.

Repeat twice for a full 10-minute workout.


H2: Why Moms Love HIIT

The 10-Min HIIT for busy moms is not just about physical results—it’s also about mental health. This type of training:

  • Reduces stress and anxiety.
  • Builds confidence and self-esteem.
  • Increases energy to keep up with kids and work.

At  SoleFitness,  we believe fitness should empower, not overwhelm.


FAQ on 10-Min HIIT for Busy Moms

Q1: Can 10 minutes of HIIT really make a difference?
Yes! Studies show that HIIT is effective for fat loss, strength, and endurance, even in short sessions.

Q2: Do I need equipment for HIIT?
Not at all—bodyweight moves like squats, burpees, and planks are perfect.

Q3: How often should moms do HIIT?
2–4 times a week is ideal for balancing recovery and results.


Weekly Workout Plan for Beginners

My Progress Wasn’t Fast – But It Was Mine

My Progress Wasn’t Fast – But It Was Mine

  My Progress Wasn’t Fast – But It Was Mine

When it comes to fitness, many people expect instant results, but the truth is my progress wasn’t fast – but it was mine. This mindset is what makes the difference between those who quit early and those who keep going until they succeed. Progress in fitness, whether it’s building strength, losing weight, or improving endurance, often comes slower than we hope. Yet, slow progress is still progress, and more importantly—it’s uniquely yours.

At SoleFitness, we remind our community that fitness is a personal journey. Just because someone else reached their goal faster doesn’t mean your journey isn’t just as valuable. What matters is ownership of your growth.


Why “My Progress Wasn’t Fast – But It Was Mine” Matters

The phrase my progress wasn’t fast – but it was mine highlights the importance of patience and consistency in fitness. Everyone starts at a different level, with different challenges. Some see quick results, while others experience gradual change. But both journeys are valid.

  • Slow progress builds discipline.
  • Consistency leads to habits.
  • Every small step brings long-term change.

Celebrating Small Wins in Fitness

When you acknowledge that my progress wasn’t fast – but it was mine, you learn to celebrate the small wins. Maybe you added 2kg to your squat, jogged an extra 5 minutes, or finally stuck to a full week of workouts. These victories might seem minor, but they build the foundation of your long-term success.

👉 At SoleFitness blog, , we often share success stories of people who didn’t achieve overnight results but reached their goals through dedication and persistence.


How to Embrace Your Own Fitness Journey

If you find yourself comparing your pace to others, remember the power of the phrase my progress wasn’t fast – but it was mine. Here are ways to stay motivated:

  1. Track your progress – Write down your workouts, weight lifted, or distance run.
  2. Focus on consistency – Even 20 minutes a day makes a difference over time.
  3. Set realistic goals – Aim for gradual improvements, not instant perfection.
  4. Celebrate yourself – Acknowledge the effort, not just the result.

FAQ – My Progress Wasn’t Fast – But It Was Mine

Q1: What does “My progress wasn’t fast – but it was mine” mean in fitness?
A1: It means valuing your personal growth, no matter how slow it feels, and recognizing that consistent effort leads to sustainable results.

Q2: How do I stay motivated if my results are slow?
A2: Focus on small wins, track your progress, and remember that long-term fitness is about building habits, not rushing results.

Q3: Why is slow progress important?

A3: Slow progress is sustainable and prevents burnout or injury. It ensures your results last longer.

Q4: Where can I find more fitness motivation?
A4: Check out SoleFitness workout tips,  for inspiration.


Final Thoughts on My Progress Wasn’t Fast – But It Was Mine

The phrase my progress wasn’t fast – but it was mine reminds us that fitness is not a race, but a lifelong journey. Progress that takes time is progress that lasts. Be proud of every rep, every drop of sweat, and every effort you put in, because it’s yours and no one can take it away.

At SoleFitness, we believe that your journey—no matter how slow—is worth celebrating. Stay consistent, trust the process, and remember: the only competition that matters is the one with yourself.

Best Elliptical Machines1

  5 Stretching Routines for Flexibility

5 Stretching Routines for Flexibility


  5 Stretching Routines for Flexibility

Improving your mobility and preventing stiffness starts with 5 Stretching Routines for Flexibility that can easily fit into your daily workout schedule. At  SoleFitness, we believe stretching is just as important as strength and cardio training, as it enhances performance, reduces injury risk, and helps with muscle recovery.

Whether you’re an athlete, a gym enthusiast, or someone seeking a healthier lifestyle, these 5 stretching routines will keep your body moving with ease.


  Stretching Routine 1 – Hamstring Stretch

The first of the 5 Stretching Routines for Flexibility focuses on your hamstrings, which often become tight from sitting too long or heavy leg workouts.

How to perform:

  • Sit on the floor with one leg extended straight.
  • Bend the other leg with the sole of the foot against your inner thigh.
  • Reach forward toward your toes.
  • Hold for 20–30 seconds and repeat on both sides.

👉 Pair this stretch with lower body strength exercises like the Sole Linear Leg Press Machine for balanced muscle development.


 Stretching Routine 2 – Hip Flexor Stretch

Hip flexors often get tight due to prolonged sitting. This routine from the 5 Stretching Routines for Flexibility is crucial for mobility.

How to perform:

  • Kneel on one knee with the other foot in front at a 90-degree angle.
  • Push your hips forward while keeping your back straight.
  • Hold for 20–30 seconds per side.

  Stretching Routine 3 – Shoulder Stretch

The third stretch in 5 Stretching Routines for Flexibility improves posture and releases upper-body stiffness.

How to perform:

  • Bring one arm across your chest.
  • Use the opposite arm to gently pull it closer.
  • Hold for 20–30 seconds, switch arms.

👉 For complete upper-body conditioning, check out our Full Body Dumbbell Workout.


 Stretching Routine 4 – Cat-Cow Stretch

This dynamic stretch from the 5 Stretching Routines for Flexibility is excellent for spine mobility and posture correction.

How to perform:

  • Start on all fours with hands under shoulders, knees under hips.
  • Inhale, arch your back (cow pose).
  • Exhale, round your back (cat pose).
  • Repeat for 5–10 breaths.

  Stretching Routine 5 – Calf Stretch

The last of the 5 Stretching Routines for Flexibility focuses on the calves, which can become tight after running or intense cardio.

How to perform:

  • Stand facing a wall.
  • Place one foot behind you and press the heel into the ground.
  • Lean forward slightly while keeping your back straight.
  • Hold for 20–30 seconds per leg.

FAQs – 5 Stretching Routines for Flexibility

Q1: How often should I follow these 5 Stretching Routines for Flexibility?
Daily stretching is recommended, especially after workouts or long periods of sitting.

Q2: Can stretching improve workout performance?
Yes, stretching enhances mobility, which improves range of motion and reduces injury risk.

Q3: Should I stretch before or after workouts?
Dynamic stretches are best before, while static stretches (like these) are best after workouts.

Q4: Can beginners do these 5 Stretching Routines for Flexibility?
Absolutely! They’re safe and effective for all fitness levels.


Final Thoughts

The 5 Stretching Routines for Flexibility are simple yet powerful ways to enhance your fitness journey. They improve posture, reduce stiffness, and support overall health.

At SoleFitness, we encourage incorporating stretching into your daily routine alongside strength and cardio training. For more wellness tips, explore our blogs on Best Cardio Machines for Home Use and How to Stay Consistent with Workouts.


Sole Linear Leg Press Machine Guide

Sole Linear Leg Press Machine Guide


  Sole Linear Leg Press Machine GuideSole Linear Leg Press Machine Guide

If you’re looking to strengthen your lower body safely and effectively, the Sole Linear Leg Press Machine Guide is your ultimate resource. This machine is designed to target your quads, glutes, hamstrings, and calves with controlled resistance, making it an essential addition to both commercial and home gyms.  SoleFitness, we recommend the Sole Linear Leg Press for athletes, beginners, and fitness enthusiasts who want maximum leg development with minimal risk of injury.


 Why Choose the Sole Linear Leg Press Machine?

The Sole Linear Leg Press Machine Guide highlights its ability to provide a natural range of motion while reducing stress on your joints and back compared to traditional squats. This makes it a safer option for individuals recovering from injury or those seeking low-risk strength training.

Key reasons to choose it:

  • Smooth linear bearing system for controlled movement.
  • Adjustable seat and back support for comfort.
  • Heavy-duty frame for durability.
  • Suitable for progressive overload training.

  Benefits of the Sole Linear Leg Press Machine

The Sole Linear Leg Press Machine Guide emphasizes several benefits:

  • Muscle Growth: Effectively isolates and trains the lower body muscles.
  • Joint Safety: Reduces unnecessary strain on knees and back.
  • Versatility: Adjustable resistance makes it perfect for both beginners and advanced users.
  • Convenience: Allows heavy lifting without the need for a spotter.

  How to Use the Sole Linear Leg Press Machine

  1. Adjust the seat and footplate to fit your height and comfort.
  2. Sit firmly with your back pressed against the pad.
  3. Place your feet shoulder-width apart on the footplate.
  4. Push the plate upward to release the safety handles.
  5. Slowly lower the weight until your knees form a 90-degree angle.
  6. Press the plate back up without locking your knees.

👉 For a complete leg routine, check out our Full Body Dumbbell Workout and add variety to your strength sessions.


H2: Sole Linear Leg Press vs Squats

While squats are excellent, the Sole Linear Leg Press Machine Guide shows how this machine provides more control, stability, and reduced injury risk. It’s especially beneficial for people who may not have the mobility or balance for heavy barbell squats.

For cardio balance with strength training, read our guide on Treadmill Walking for Weight Loss.


FAQs – Sole Linear Leg Press Machine Guide

Q1: Is the Sole Linear Leg Press Machine good for beginners?
Yes, it’s ideal for beginners because it provides guided movement and safety support.

Q2: Can I build big legs with the Sole Linear Leg Press Machine?
Absolutely! Consistent progressive overload can help build strength and muscle mass.

Q3: Is the Sole Linear Leg Press Machine safe for knee problems?
Yes, when used correctly, it places less strain on the knees compared to free weight squats.

Q4: How often should I use the leg press?
2–3 times per week is effective, depending on your workout split and recovery time.


Final Thoughts

The Sole Linear Leg Press Machine Guide proves why this equipment is a staple in gyms worldwide. Whether you want to build strength, recover safely, or supplement your squat training, the Sole Linear Leg Press is a powerful tool for leg development.

At  SoleFitness, we supply top-quality fitness equipment designed to help you achieve your health and strength goals. Explore our full range of strength machines today and take your training to the next level.


Best Elliptical Machines1

Product Spotlight: Sole Elliptical

Sole Elliptical

    Sole Elliptical

Meta Title: Product Spotlight: Sole Elliptical – Features, Benefits, and Why It’s Perfect for Your Fitness Journey
Meta Description: Discover the power of the Sole Elliptical in this product spotlight. Learn its key features, benefits, and why it’s one of the best cardio machines for home and gym use.
Focus Keyphrase: Product Spotlight: Sole Elliptical


Product Spotlight: Sole Elliptical

When it comes to cardio equipment that combines performance, comfort, and durability, the Product Spotlight: Sole Elliptical is worth your attention. Ellipticals are widely regarded as one of the most effective low-impact cardio machines, and Sole Fitness has built a strong reputation for engineering ellipticals that last. In this product spotlight, we’ll break down why the Sole Elliptical stands out for both home and commercial use.


Why Choose the Sole Elliptical?

The Product Spotlight: Sole Elliptical highlights its ability to provide a smooth, natural motion that mimics walking or running while protecting your joints from impact. Unlike treadmills, ellipticals reduce strain on your knees, hips, and back, making them ideal for people of all fitness levels—including beginners, athletes, and those recovering from injury.

At SoleFitness  we recommend the Sole Elliptical to clients who want a safe yet challenging workout.


Key Features of the Sole Elliptical

1. Ergonomic Design

The Product Spotlight: Sole Elliptical showcases its carefully engineered design with adjustable stride length and oversized pedals to ensure user comfort.

2. Advanced Console Technology

Sole Ellipticals come equipped with an easy-to-use console, preloaded workout programs, Bluetooth connectivity, and integration with fitness apps for tracking progress.

3. Sturdy and Durable Build

One of the highlights in this Product Spotlight: Sole Elliptical is the commercial-grade steel frame, designed for long-term use at both home and gym settings.

4. Full-Body Engagement

Unlike bikes or rowers, the Sole Elliptical engages both upper and lower body muscles simultaneously, helping you burn more calories in less time.


Benefits of Training on the Sole Elliptical

  • Low-impact cardio: Protects your joints while delivering effective calorie burn.
  • Weight loss support: A 30-minute session can torch hundreds of calories.
  • Muscle toning: Targets legs, glutes, arms, and core for full-body training.
  • Convenience: Quiet operation and compact design make it perfect for home gyms.

👉 For those building a home gym, don’t forget to check our Home Gym Safety Checklist to set up your workout space effectively.


Sole Elliptical vs Other Cardio Machines

When comparing the Sole Elliptical to treadmills or stationary bikes, many users find ellipticals to be the best middle ground—delivering calorie-burning intensity without the pounding impact. If you’re interested in exploring alternatives, check out our guide on Best Cardio Machines for Home Use.


FAQs about the Sole Elliptical

Q1: Is the Sole Elliptical good for beginners?
Yes, the Sole Elliptical is perfect for beginners because of its adjustable resistance and joint-friendly motion.

Q2: Can I lose weight with the Sole Elliptical?
Absolutely. Consistent workouts can burn significant calories and contribute to weight loss when combined with a healthy diet.

Q3: Does the Sole Elliptical require much maintenance?
Not at all. With regular cleaning and occasional lubrication, the Sole Elliptical remains smooth and reliable.

Q4: How long should I use the Sole Elliptical daily?
A 20–40 minute session is ideal depending on your fitness level and goals.


Final Thoughts on the Sole Elliptical

The Product Spotlight: Sole Elliptical proves that it’s more than just a cardio machine—it’s an investment in your health, fitness, and lifestyle. Whether you’re looking for weight loss, endurance training, or low-impact conditioning, the Sole Elliptical is one of the best choices on the market today.

At Solefitness, we are committed to helping you choose fitness equipment that matches your needs. Explore our full range of cardio machines and take the first step towards a healthier, stronger you.


Fitness Is More Than a Look

How to Stay Consistent with Workouts

How to Stay Consistent with Workouts


How to Stay Consistent with Workouts

Staying motivated is one thing, but how to stay consistent with workouts is what truly separates short-term efforts from long-term fitness results. At GateGold and SoleFitness, we know that consistency is the foundation of strength, endurance, and lasting transformation. Whether you are training for weight loss, strength building, or overall health, consistency ensures that every workout compounds toward your ultimate goals.


Why Consistency Matters in Fitness

Understanding how to stay consistent with workouts begins with recognizing why it matters. Fitness is not about instant results but about steady progress over weeks, months, and years. Missing too many sessions breaks your momentum, making it harder to reach your goals. Consistency builds:

  • Physical habits – Your body adapts better to regular training.
  • Mental resilience – Discipline grows when you stick to a routine.
  • Visible results – Fat loss, muscle gain, and energy improvements happen gradually.

👉 For more on building long-term habits, check out our guide on How to Build Discipline Through Gym Routine.


How to Stay Consistent with Workouts – Practical Strategies

1. Set Clear Goals

You must define why you’re working out. Whether it’s weight loss, improved health, or building strength, clear goals help you stay committed.

2. Create a Realistic Schedule

Consistency is easier when you schedule your sessions like appointments. Start with 3–4 days per week and build from there. See our Gym Schedule for Weight Loss for a sample routine.

3. Track Your Progress

Use apps, journals, or even photos to track progress. Small wins keep you motivated to continue.

4. Mix Up Your Workouts

If boredom is stopping you, try switching between cardio, strength training, HIIT, or even fun options like CrossFit. Our article on CrossFit vs Strength Training explains the differences.

5. Find Accountability

Training with a partner, joining a class, or checking in with an online community like GateGold and SoleFitness can keep you accountable.


 Overcoming Challenges to Consistency

Even when you know how to stay consistent with workouts, challenges will appear. Common struggles include:

  • Lack of time – Solution: shorter but effective workouts (like HIIT).
  • Loss of motivation – Solution: focus on discipline, not just feelings.
  • Plateaus – Solution: change workout intensity or style.

👉 For cardio ideas that fit into a busy schedule, see our guide on Best Cardio Machines for Home Use.


 FAQs on How to Stay Consistent with Workouts

Q1: What is the best way to stay consistent with workouts if I’m busy?
A: Shorter, more intense workouts like 20-minute HIIT sessions are perfect for busy people.

Q2: How long before I see results from being consistent?
A: With proper nutrition, you can start noticing changes in 4–6 weeks, but lasting results come from months of consistency.

Q3: How can SoleFitness equipment help with consistency?
A: Reliable and high-quality machines like Sole treadmills and recumbent bikes make it easier to maintain regular workouts at home.


Conclusion

Knowing how to stay consistent with workouts is not about perfection but about persistence. Every session adds up. By setting clear goals, building discipline, using the right equipment, and relying on GateGold and SoleFitness resources, you can create a fitness lifestyle that lasts.


 Mesomorph Advantage: Unlocking Your Fitness Potential

How to Build Discipline Through Gym Routine

How to Build Discipline Through Gym Routine

How to Build Discipline Through Gym Routine

If you want lasting fitness success, the secret lies in

how to build discipline through gym routine. Many people start working out with motivation, but motivation fades quickly. What keeps you going is discipline – the ability to stick to your plan, show up consistently, and push through even when it feels difficult. In this guide, we’ll explore how to build discipline through gym routine, with practical strategies that can help you stay committed whether you train at home with GateGold Fitness equipment or at a professional facility with SoleFitness gear.


Why Discipline Matters in Fitness

The foundation of fitness is not built on one good workout but on the discipline to keep going day after day. Understanding how to build discipline through gym routine helps you:

  • Stick to your fitness goals.
  • Develop mental toughness.
  • Build consistency in strength and cardio training.
  • Create a healthier lifestyle beyond the gym.

Steps on How to Build Discipline Through Gym Routine

1. Set Clear and Realistic Goals

When learning how to build discipline through gym routine, start by setting achievable goals. Instead of saying, “I want to lose weight,” define it as: “I will train 4 times per week for the next 3 months.”


2. Create a Structured Gym Schedule

Discipline thrives on routine. Plan your workouts as appointments you cannot miss. Check out our post on Gym Schedule for Weight Loss for ideas on creating a time-efficient plan.


3. Start Small and Build Consistency

If you are new, don’t overwhelm yourself with long, intense workouts. Focus on small wins like completing three 30-minute workouts per week. Consistency is the foundation of discipline.


4. Track Progress and Celebrate Wins

Part of mastering how to build discipline through gym routine is measuring progress. Use fitness apps, training logs, or smart equipment like SoleFitness recumbent bikes to stay motivated.


5. Train Your Mind Along with Your Body

Gym discipline isn’t only physical – it’s mental. Build resilience by pushing through challenging workouts and using affirmations like “I am stronger than my excuses.” For more inspiration, read our motivational post: You Are Worth the Sweat.


Common Challenges in Building Gym Discipline

Even when you understand how to build discipline through gym routine, you’ll face obstacles:

  • Skipping workouts due to lack of time.
  • Losing interest after the first few weeks.
  • Struggling with soreness or fatigue.

The key is not perfection but persistence. Each time you get back up, you strengthen your discipline.


FAQs – How to Build Discipline Through Gym Routine

Q1: How long does it take to build gym discipline?
It usually takes 2–3 months of consistency for gym habits to become natural.

Q2: What if I lose motivation?
Discipline replaces motivation. Remind yourself why you started and stick to your schedule.

Q3: Can a home gym help me stay disciplined?
Yes! Having equipment from GateGold Fitness or SoleFitness makes training more accessible and removes excuses.

Q4: Should I work out daily to build discipline?

Not necessarily. Discipline is about consistency, not burnout. Aim for 3–5 structured workouts per week.


Home Gym Safety Checklist

Home Gym Safety Checklist

Home Gym Safety Checklist

 Home Gym Safety Checklist

Creating your personal workout space is exciting, but it also comes with responsibilities. A Home Gym Safety Checklist is essential to ensure that your training environment is safe, effective, and supportive of your fitness goals. At GateGold and SoleFitness, we want you to maximize your workouts without risking injuries, so this guide will help you set up your gym the right way.


Why You Need a Home Gym Safety Checklist

Many people set up home gyms without considering the risks of poor equipment placement, lack of maintenance, or incorrect training habits. A Home Gym Safety Checklist ensures:

  • Proper equipment setup
  • Reduced risk of accidents
  • Long-term durability of machines
  • Peace of mind while working out

👉 You can also explore our article on Best Cardio Machines for Home Use to get equipment ideas that match both safety and performance.


 Essential Home Gym Safety Checklist Items

1. Secure Equipment Placement

Make sure treadmills, bikes, and weight machines are placed on level ground. Always leave enough space around machines for safe movement.

2. Regular Equipment Maintenance

Check bolts, cables, and belts on your machines regularly. Equipment from SoleFitness is designed for durability, but proper upkeep ensures longevity.

3. Flooring Matters

Invest in gym mats or rubber flooring to reduce slips, protect your joints, and prevent floor damage.

4. Proper Lighting & Ventilation

A safe gym space is well-lit and ventilated. Poor visibility can cause accidents, while good airflow boosts endurance.

5. First Aid & Emergency Preparedness

Keep a first-aid kit handy. Even small injuries need quick care to prevent long-term issues.


 Smart Training Practices for Home Gym Safety

Your Home Gym Safety Checklist isn’t just about equipment—it’s about how you train.

  • Warm up and cool down to prevent injury.
  • Use correct form to avoid strain.
  • Don’t lift more than you can handle.
  • Stay hydrated and take breaks.

👉 Read our motivational post You Are Worth the Sweat for encouragement on pushing through safely and effectively.


 Internal Links for Better Guidance

At GateGold and SoleFitness, we know safety is part of progress. For more guidance:


 FAQ – Home Gym Safety Checklist

Q1: How often should I check my home gym equipment?
A1: At least once a month, and more often if you use machines daily.

Q2: What flooring is best for a home gym?
A2: Rubber flooring or thick gym mats provide the best support and prevent accidents.

Q3: Do I need professional installation for home gym equipment?
A3: For larger machines like treadmills or multi-stations, professional setup ensures safety and proper alignment.


Search for products

Back to Top
Product has been added to your cart